Decoupage Classes and Workshops in Anchorage: A Complete Guide
Decoupage — from the French “to cut out” — is the art of decorating surfaces by adhering cut paper or fabric to an object, then sealing it with multiple coats of finish to create a smooth, integrated surface that looks painted rather than pasted. The technique has a history stretching back to 17th-century European furniture decoration and Japanese lacquerwork, but its contemporary appeal lies in how much creative range it offers for relatively little skill investment: almost anyone can produce genuinely beautiful decoupage work in a first session, and the medium scales from simple craft projects to sophisticated mixed-media furniture restoration. In Anchorage, decoupage workshops have found a consistent audience particularly among participants interested in upcycling and personalizing objects — transforming thrift store furniture, plain wooden trays, or basic glass vases into distinctive pieces with handmade character. The craft’s flexibility with paper types, surface materials, and finishing effects makes it among the most accessible and creatively wide-ranging introductory crafts available. This guide covers paper selection, adhesive options, surface preparation, finishing and aging effects, and creative project ideas for 2026.
Paper Selection
The paper defines the visual character of a decoupage piece — its texture, opacity, pattern, and how it behaves when wet with adhesive. Different paper types produce very different results:
- Tissue paper: Very thin, semi-transparent, and highly conformable to curved surfaces. Tissue paper wrinkles when wet, and those wrinkles become part of the finished texture — some makers deliberately enhance this wrinkled quality for a textured, aged look. Tissue paper creates layered depth when overlapping pieces allow lower layers to show through. It’s excellent for covering curved objects (bottles, vases, rounded furniture legs) because it conforms without tearing.
- Napkins: Decorative paper napkins (the three-ply variety sold for entertaining) are split into individual plies before use — only the thin printed top ply is used, making it nearly as thin as tissue paper but pre-printed with designs. Napkin decoupage produces very flat, smooth results because the thin ply becomes almost invisible under adhesive, leaving only the print visible. Floral napkins, botanicals, and vintage illustrations from napkin collections produce sophisticated results with minimal cutting effort.
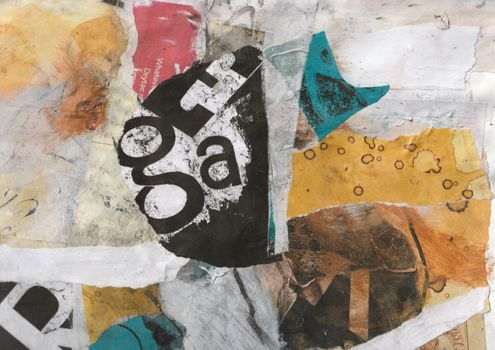
- Magazine pages and book pages: Heavier than napkins and tissue, magazine pages provide bold graphic imagery and text patterns. Book pages (from vintage or damaged books) create a distinctive typographic texture, particularly popular for furniture decoupage and mixed-media art. Heavier papers don’t conform to curves as readily and may need scoring or overlapping cuts to wrap around curved surfaces.
- Rice paper and mulberry paper: Handmade papers with visible fiber texture that adds organic character to the finished surface. Rice paper tears rather than cuts (torn edges blend more seamlessly into the surface than cut edges), producing a naturalistic, soft-edged quality. Popular for botanical and nature-themed decoupage where visible paper edges would interrupt the organic aesthetic.
- Specialty papers: Wrapping paper, sheet music, maps, scrapbooking paper, and digital prints all work as decoupage media. The key consideration for any paper is whether it’s too thick to conform to the surface and whether the print is likely to bleed when wet with adhesive (test a small piece first).
Mod Podge vs. PVA Glue
Two adhesive systems dominate decoupage:
Mod Podge is a pre-made, all-in-one decoupage medium that functions as adhesive (for adhering paper to the surface), top coat (for sealing layers), and finish (it’s available in matte, satin, and gloss formulations). Its convenience — one product does everything — makes it the standard for workshops and beginner decoupage. Mod Podge dries clear in most formulations and is water-soluble while wet (easy cleanup), water-resistant when cured. Specialty formulations include Outdoor Mod Podge (more water-resistant for outdoor projects), Fabric Mod Podge (wash-resistant for fabric application), and Hard Coat Mod Podge (more durable for high-traffic surfaces). The main limitation is that it’s slightly more expensive than DIY alternatives and its finish, while adequate for most projects, isn’t as durable as a separate final varnish.
PVA glue (white craft glue, school glue) diluted with water (typically 3 parts PVA to 1 part water) functions as an effective adhesive and sealant for decoupage at significantly lower cost. The same diluted PVA works for both adhering and sealing, and it dries clear. PVA decoupage typically uses a separate final finish coat (varnish, wax, or resin) for durability and the specific surface quality desired. Experienced decoupage practitioners often prefer PVA for its flexibility and lower cost in large projects.
Surface Preparation
Surface preparation determines whether decoupage adhesive bonds reliably and whether the finished piece holds up over time:
- Wood: Sand smooth, wipe clean of dust, and apply a coat of primer or base paint (the color shows through thin papers and frames the overall design). Raw wood absorbs adhesive quickly, so a primer coat before decoupage prevents the paper from bonding unevenly. Pre-painted or pre-finished wood should be lightly sanded to remove gloss that would prevent adhesion.
- Glass: Clean thoroughly with isopropyl alcohol to remove oils and residue. Glass is non-porous, so there’s no priming needed — but the surface must be completely clean and grease-free. Decoupage on glass typically applies paper to the inside of a clear glass piece (applied from the outside, then protected by the glass) for a display-quality finish where the glass protects the paper.
- Furniture: Sand, clean, and prime or base coat. Old paint in good condition can be decoupaged over directly; peeling or crumbling paint should be stripped and the surface re-primed. Furniture decoupage projects benefit from multiple sealing coats and a durable final finish (polyurethane varnish or resin) to withstand everyday use.
- Metal: Clean with isopropyl alcohol and apply a metal primer before decoupage. Metal expands and contracts with temperature, which can eventually cause adhesive failure without a flexible primer layer.
Sealing and Finishing Techniques
Multiple sealing coats over the adhered paper protect the design and create the smooth, integrated surface that distinguishes polished decoupage from casual collage:
Apply three to five coats of sealant (Mod Podge or diluted PVA) over the adhered paper, allowing each coat to dry completely before the next. Light sanding between coats (400-grit sandpaper) removes brush marks and paper edge ridges, producing a progressively smoother surface. After the final sealant coat, a separate finish layer — matte varnish, satin varnish, paste wax, or clear resin — provides additional durability and the specific surface quality desired.
Aging and Distressing Effects
Deliberate aging transforms fresh-looking decoupage into pieces with apparent history and character:
- Tea or coffee staining: Soaking paper in strong tea or coffee before use produces a warm, aged tone across the paper surface, particularly effective on white or cream papers with vintage-style prints.
- Brown ink edging: Running a brown or black ink pad along the torn edges of paper pieces darkens them, adding visible definition that mimics the patina of aged paper.
- Distressing wax: Dark wax (Briwax Dark, Rust-Oleum Chalked Dark Wax) rubbed over a finished decoupage surface and wiped back creates a shadowed depth in recessed areas and a worn appearance on raised edges — the standard technique for farmhouse and vintage-style furniture decoupage.
- Crackle medium: Applied between a base coat and a top coat of different paint colors, crackle medium causes the top coat to crack as it dries, revealing the base color through a network of cracks that mimics aged paint. Combined with decoupage imagery, crackle effects produce convincingly antique-looking pieces.
Creative Project Ideas
Decoupage’s versatility covers a wide project range:
- Decorative trays and boxes: Wooden or metal trays and storage boxes are among the most popular decoupage projects — flat surfaces are easy to work and the finished pieces are immediately functional. Alaska-themed papers (topographic maps, vintage travel posters, botanical prints of Alaska wildflowers from Kincaid Park meadows and the Chugach foothills) produce regionally distinctive results that make the finished pieces genuine souvenirs of the Anchorage landscape.
- Upcycled furniture: A thrift store side table, dresser drawer fronts, or a chair seat transformed with decoupage and distressing produces heirloom-quality results at low cost. One of the most satisfying decoupage applications — the transformation from plain to personalized is dramatic.
- Seasonal ornaments and gift wrapping: Glass ball ornaments, wooden cutout shapes, and papier-mâché forms covered in tissue or napkin decoupage make distinctive handmade gifts and decorations.
- Framed artwork: Decoupage imagery on wood panels or canvas, sealed and finished as framed pieces, produces results that read as mixed-media fine art rather than craft.
Decoupage Workshops in Anchorage
Anchorage decoupage workshops typically run 2–3 hours, covering a tray, small piece of furniture, or set of decorative objects. Workshops that incorporate Alaska-specific paper selections — vintage Anchorage maps, Alaska botanical prints, wildlife imagery — give participants a regionally meaningful finished piece. The relatively low mess factor of decoupage (water-soluble adhesives, no heat or chemical hazards beyond normal glue) makes it a popular format for community events and group crafting sessions.
Workshop prices run $35–$70, with surface piece, papers, adhesive, and brushes included. A home decoupage starter kit (Mod Podge in matte and gloss, assorted decorative papers, foam brushes) costs $20–$35 and enables many project sessions. Our free things to do in Anchorage guide covers the craft markets and artisan events — including the Anchorage Market & Festival at Town Square Park, where decoupage artists and mixed-media craftspeople exhibit and sell their upcycled work through the summer season — where Anchorage’s handmade arts economy is most visible. The Anchorage Museum‘s shop and gallery exhibitions are worth visiting for Alaska-specific design inspiration — historical photographs, Native art patterns, and Alaska landscape imagery that translate well into decoupage papers and mixed-media projects. Our Anchorage hiking guide covers the natural environments whose imagery — wildflowers, wildlife, landscape — provides the richest Alaska-specific design inspiration for decoupage projects.
Photo by hello aesthe on Pexels.


No comments yet.