Tie-Dye Workshops in Anchorage 2026 — Folding, Binding and Alaska Color Palettes
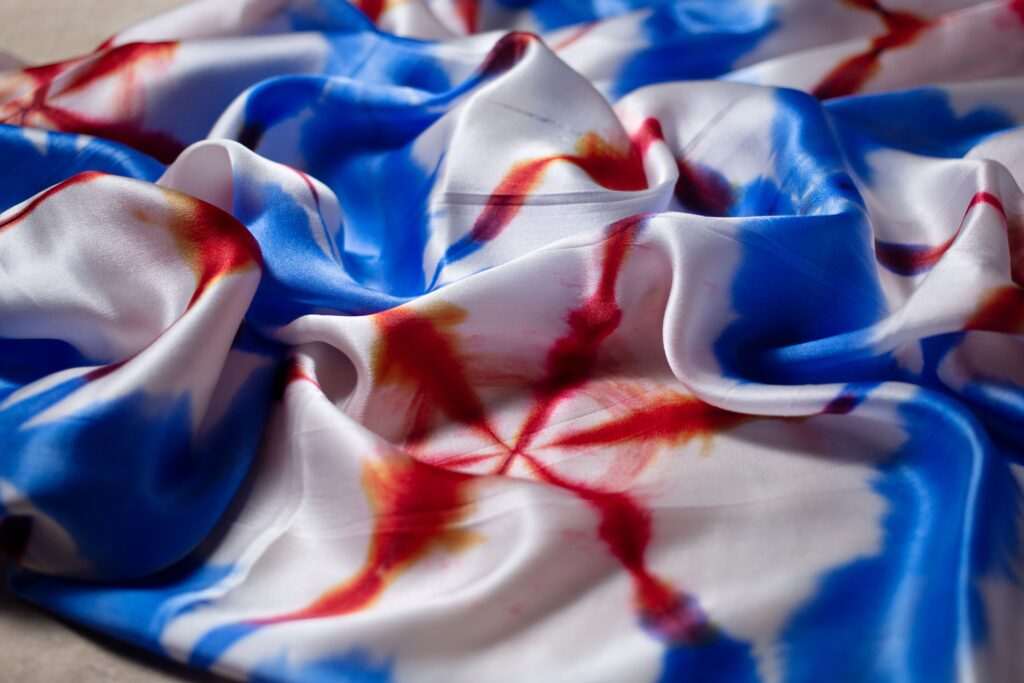
Tie-dye has moved well beyond the stereotypes of its 1960s cultural peak — contemporary textile dyeing with folding and binding techniques produces results ranging from the bold, graphic spirals of street market aesthetic to the subtle shibori-influenced gradients that appear in high-end fashion and fine craft. The underlying principle hasn’t changed: by folding, twisting, bunching, or binding fabric before applying dye, you create resist patterns where the bound areas block color penetration, producing designs that emerge only when the fabric is unfolded. The specific pattern is determined entirely by the folding method used before dyeing. Anchorage’s craft workshop scene has embraced tie-dye as one of the most participatory craft formats available — the combination of immediate visual results, Alaska-inspired color palettes, and the appeal of wearable finished pieces makes it consistently popular. This guide covers tie-dye workshops in Anchorage in 2026, the dye chemistry involved, folding and binding techniques, and color theory for vibrant results.
Fiber Reactive vs. All-Purpose Dyes
The type of dye determines both the vibrancy of the finished piece and the complexity of the process. Two main categories appear in workshop settings:
Fiber reactive dyes (Procion MX and similar) form a permanent chemical bond with cellulose fiber — cotton, linen, rayon, and bamboo. The chemical reaction (catalyzed by soda ash) creates dye that’s integrated into the fiber structure rather than sitting on the surface, producing colors that stay vivid through hundreds of washes without fading. Fiber reactive dyes work only on natural cellulose fibers and require a soda ash pre-soak (or post-application soda ash solution) to trigger the bonding reaction. They’re the professional standard for tie-dye and produce the most saturated, lasting results. Most serious tie-dye workshops use fiber reactive dyes.
All-purpose dyes (Rit, Tulip, and similar retail brands) work on a wider range of fiber types, including cotton, rayon, and some synthetic blends, but produce less saturated colors with lower wash fastness than fiber reactive dyes. They’re easier to find at craft stores, require no soda ash, and work in hot water — making them more accessible for home projects. All-purpose dyes are adequate for casual projects but show visible fading after repeated washing compared to fiber reactive results.
For shirts and wearable pieces intended for regular use, fiber reactive dyes in 100% cotton fabric produce the best long-term results. Pre-washing the garment before dyeing removes sizing and improves dye absorption.
Essential Folding and Binding Techniques
The pattern comes from the fold. Each technique produces a predictable result that can be modified by color placement and binding density:
- Spiral: The most iconic tie-dye pattern. Pinch the fabric at the center point, twist into a flat disk, then secure with rubber bands in a grid pattern across the disk. Apply different colors to the segments between the rubber bands — each color radiates outward from the center in a pinwheel pattern. The tightness of the twist and the size of the disk affect how tight or open the spiral arms appear.
- Accordion fold (stripes): Fold the fabric in accordion pleats (forward-back-forward) in one direction, then secure with rubber bands at regular intervals. Apply colors to the sections between the bands — after unfolding, the colors appear as parallel stripes. Folding in two perpendicular directions before banding creates a plaid or grid pattern.
- Crumple (scrunch): The most improvisational technique — crumple the fabric into a loose ball and apply rubber bands randomly across it, then apply colors to different areas of the crumpled mass. After unfolding, the pattern is organic and non-repeating. Color placement determines the overall palette but the specific forms are unique to each piece.
- Bullseye (concentric circles): Pinch the fabric at one point and pull upward, allowing the rest of the fabric to hang straight down in folds. Apply rubber bands at regular intervals along the resulting cone shape. Colors applied between bands produce concentric rings after unfolding.
- Shibori itajime (fold-and-clamp): Japanese resist-dyeing technique using folded fabric clamped between two flat shapes (wood blocks, acrylic squares). The clamped areas resist dye penetration; unclamped areas absorb color. Produces geometric patterns determined by the fold and clamp shape — triangles, squares, chevrons, and diamonds depending on the folding sequence.
- Ice dyeing: Fabric is crumpled and placed over a rack, covered with ice, and powdered fiber reactive dye is sprinkled over the ice. As the ice melts, the water carries the dye through the fabric in organic, unpredictable patterns influenced by the ice crystal structure. Produces the most fluid, watercolor-like results of any tie-dye technique.
Color Theory for Tie-Dye
Color placement relative to neighboring colors determines whether the finished piece has vibrant, clean color sections or muddy overlap zones where adjacent colors mix. A few principles that improve results significantly:
- Analogous colors stay clean: Colors next to each other on the color wheel (blue and purple; yellow and orange; red and orange) mix in their overlap zones into intermediate hues that look intentional. Placing blue next to purple produces a blue-violet overlap that reads as part of the design.
- Complementary colors create mud: Colors opposite on the color wheel (blue and orange; red and green; yellow and purple) mix in their overlap zones into grey-brown mud. Separate complementary colors with a white or neutral buffer zone (unbanded fabric that picks up diluted color rather than full saturation) to prevent overlap mixing.
- Three-color limit for beginners: More colors create more potential for muddy overlaps. Starting with two or three colors in a tight analogous or split-complementary relationship produces more coherent, readable results than applying six or seven colors.
- Alaska palette inspiration: Anchorage workshops often feature Alaska-inspired palettes: aurora colors (teal, purple, magenta), glacier tones (pale blue, grey-green, white), wildflower combinations drawn from the fireweed magenta and lupine purple visible in Kincaid Park meadows through July, and autumn tundra (russet, gold, amber). These palettes work well because they’re typically analogous or limited in range.
Setting and Rinsing
After dye application, fiber reactive-dyed pieces require a cure time (8–24 hours in a warm, sealed bag) to complete the chemical bonding reaction. During this time, the piece stays moist and warm — the ideal conditions for the dye-fiber bond to form fully. Cold or dry conditions during cure produce paler, less saturated final colors.
After curing, the piece is rinsed progressively from cold to warm water, removing unfixed dye, until the rinse water runs clear. A final wash in warm water with a small amount of dish soap removes any remaining loose dye. Skipping the progressive rinse and washing directly in hot water releases unfixed dye into the washing machine, which can then redeposit on the white resist areas.
Tie-Dye Workshops in Anchorage
Anchorage tie-dye workshops run most actively in summer and early autumn, when the appeal of dyeing outdoors (or near-outdoors in well-ventilated studios) aligns with the city’s active season. Workshop formats typically run 2–3 hours: participants pre-soak garments in soda ash, choose folding and binding techniques, apply fiber reactive dyes from squeeze bottles, then bag their pieces for the cure period. Finished pieces are either rinsed at the studio at the end of the session or taken home and rinsed after curing.
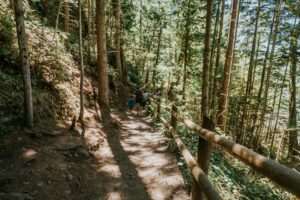
Workshop prices run $35–$65, with a garment (usually a 100% cotton T-shirt or tote bag) and dye materials included. Sessions that allow participants to bring their own items (bandanas, pillow cases, additional shirts) typically charge a materials fee per additional piece. Group tie-dye sessions — for families, parties, and team-building events — are among the most popular craft workshop formats in Anchorage’s summer programming calendar. Our free things to do in Anchorage guide covers the summer markets and community events — including the Anchorage Market & Festival at Town Square Park, where textile craft vendors and workshop pop-ups appear throughout the summer season — where tie-dye work and textile crafts are most visible. Our Anchorage hiking guide covers the wildflower and landscape environments — including the Tony Knowles Coastal Trail, where the Cook Inlet’s grey-green water, mudflat tones, and sunset aurora colors provide a living palette study — whose color palettes inspire the Alaska-specific dye combinations most popular in Anchorage workshops.
Photo by Mohamed Rizly on Pexels.

No comments yet.