Stencil Art in Anchorage: Cutting, Layering, and Banksy Technique Workshops (2026)
Stencil art bridges the gap between printmaking, painting, and graphic design — it uses a cut template to define design boundaries, then applies color through the openings to reproduce the design on any surface. The process is both ancient (hand stencils appear in Paleolithic cave art dating back 40,000 years) and urgently contemporary: street artists like Banksy have made stencil art one of the defining visual languages of urban culture, and the technique’s ability to reproduce a complex image quickly and repeatedly makes it an essential tool in textile design, home decoration, DIY art, and fine craft contexts. Stencil art’s approachability is part of its appeal — the barrier to entry is a sheet of Mylar, a craft knife, and a foam brush, and basic results are achievable in a first session without any drawing skill. The depth of technique, however, is genuine: multi-layer registration, complex cutting, and material selection produce results of considerable sophistication. Anchorage workshops have embraced stencil art as one of the most versatile and accessible craft formats available, and Alaska’s bold visual vocabulary — wildlife silhouettes, mountain horizons, graphic flora — translates naturally into stenciling’s graphic aesthetic. This guide covers stencil materials, cutting, application methods, layering and registration, fabric vs. wall vs. paper applications, and the Banksy street art tradition in 2026.
Cutting Your Own Stencils
The stencil material determines the precision, durability, and reusability of the stencil:
Mylar (Acetate Film)
Mylar (polyester film) is the professional standard for reusable stencils. It’s semi-transparent (allowing the placement of subsequent layers over previous work by seeing through), flexible (conforms to moderately curved surfaces), and durable (withstands cleaning and repeated use without deteriorating). Mylar stencils are cut with a craft knife on a self-healing cutting mat; the semi-transparency allows designs to be traced directly from a printed design placed underneath the Mylar sheet. Thickness ranges from 4 mil (thin, flexible, better for curved surfaces) to 7 mil (stiffer, better for very precise detail). Mylar is the recommended material for any stencil that’ll be used multiple times or washed between uses.
Cardstock
Heavy cardstock (card stock or manila folders) produces stencils quickly and cheaply. It cuts easily with a craft knife, holds its shape adequately for small print runs, and is disposable — a cardstock stencil used for one project session is fine to throw away rather than clean. Cardstock absorbs paint on its edges and begins to deteriorate with repeated use, making it unsuitable for large print runs or frequent cleaning. Best for one-time-use projects, quick design tests, and situations where reusability isn’t needed.
Freezer Paper
Freezer paper (the wax-coated paper used for food storage) has a unique property that makes it excellent for fabric stenciling: the wax coating adheres temporarily to fabric when ironed, creating a secure bond that prevents paint from bleeding under the stencil edge. After use, it peels away cleanly. Freezer paper stencils are single-use, cut with scissors or a craft knife, and produce crisp edges on fabric that are difficult to achieve with brush application on floating stencils. The standard stencil material for fabric T-shirt and tote bag projects in workshop settings.
Cutting Technique
Sharp blades are essential — dull blades drag and tear rather than cut, producing ragged edges that show in the printed design. A fresh craft knife blade per session, or per large project, maintains cutting quality. Cut with smooth, confident strokes following the design lines; stop-and-start cutting at corners produces cleaner results than trying to curve around corners in a single stroke. Always cut on a self-healing mat rather than a hard surface — the mat’s slight give allows the blade to cut completely through the stencil material without skipping.
Bridges: Stencil designs require “bridges” — small uncut strips that connect interior islands of the design to the stencil body. A letter “O” cut as a stencil with no bridge would produce a floating inner circle that falls out; a small bridge connecting the inner oval to the outer frame maintains structural integrity. Designing around bridges — or deliberately incorporating them as a design element — is one of the central stencil design skills.
Application Methods: Brush, Sponge, and Spray
Each application method produces different results and suits different materials:
- Stencil brush (pouncing): A stiff-bristled round brush used with an up-and-down stippling (pouncing) motion rather than side-to-side strokes. Pouncing prevents paint from bleeding under the stencil edge (which side-strokes cause by pushing paint laterally). Load the brush with a small amount of paint, offload most of it on a paper towel until the brush is nearly dry, then stipple onto the stencil. This “dry brush” approach produces clean, sharp edges and allows gradual color building. The standard approach for wall stenciling and paper stenciling.
- Foam roller: A small foam roller produces even, fast coverage for large stencil areas. Less precise than brush pouncing for detail but efficient for large geometric patterns and background coverage. The roller must be loaded lightly (same dry-brush principle as the stencil brush) to prevent paint from being pushed under the stencil.
- Sea sponge: A natural sea sponge creates a mottled, textured finish rather than solid coverage — useful for dimensional effects, faux texture, and the deliberately imperfect aesthetic of distressed and vintage-style stenciling. The irregular surface of the sponge produces variation that a brush or roller can’t replicate.
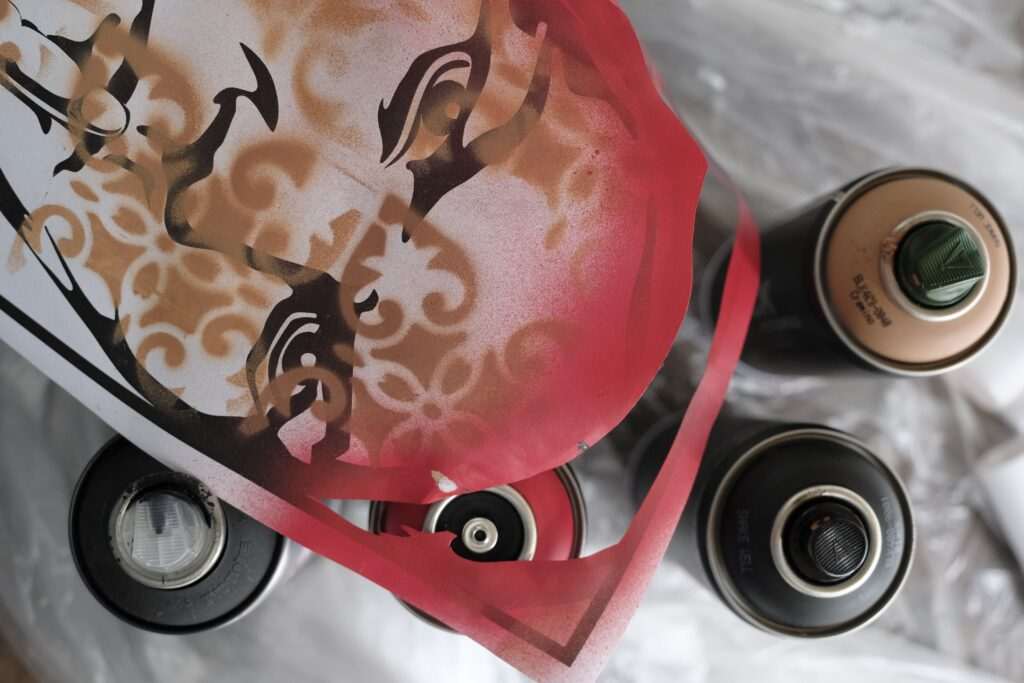
- Spray paint: Spray application (with masking to protect surrounding areas) produces feathered, gradient-capable coverage and is the standard technique for street art-style stenciling on outdoor surfaces. The aerosol droplets travel under stencil edges more readily than brush-applied paint, so holding the can farther away and spraying lighter reduces bleeding. Spray stenciling produces the characteristic soft-edge aesthetic of Banksy-style street art.
Layering for Depth and Registration
Multi-layer stenciling uses multiple stencils in sequence to build a complex multi-color image — each stencil layer applies one color, and the combined result creates depth, shading, and complexity that a single-layer stencil can’t achieve:
Registration — aligning each successive stencil layer precisely with previous layers — is the critical technical challenge in multi-layer work. Methods:
- Registration marks: Small cross or corner marks cut into each stencil layer in the same position, aligned with each other (and with marks on the substrate) before applying paint. Standard for precise multi-color work.
- Tape stops: Small pieces of tape on the work surface define the stencil position by creating physical stops at the stencil corners. Reliable for paper work; less practical for walls and fabric.
- See-through Mylar: Transparent Mylar stencils allow direct visual alignment with underlying printed layers — simply position the stencil so its design aligns correctly with what’s visible through the Mylar.
A three-layer stencil sequence (shadow layer, main color layer, highlight layer) produces realistic dimensional imagery from a flat stencil system — the same technique used in screen printing and Banksy-style urban art.
Fabric, Paper, and Wall Applications
The same stencil can be adapted for different substrates with different paint and preparation choices:
Fabric: Fabric paint (Tulip, Jacquard, or Speedball fabric medium mixed into acrylic paint) is required for wash-fast results on fabric. Freezer-paper stencils ironed to the fabric surface prevent paint bleeding. Heat-setting after drying (pressing with a hot iron) bonds the paint permanently to the fibers. 100% cotton fabric takes stencil paint most reliably.
Paper and canvas: Standard acrylic craft paint works for paper and canvas stenciling. Light paper may buckle with heavy paint application; cardstock or watercolor paper handles paint better. Canvas stenciling produces artwork-quality results when combined with careful layering technique.
Walls: Latex wall paint in the correct sheen for the surface works for wall stenciling. Tape the stencil securely to prevent movement during application; use a stencil brush or foam roller with minimal paint to prevent drips and bleeding. Wall stenciling uses large-format Mylar stencils and produces repeating patterns or focal-point designs that transform interior spaces.
Banksy and the Street Art Tradition
The most culturally influential stencil artist in history, Banksy’s anonymous urban interventions since the 1990s have defined stencil art as a serious medium for political commentary and cultural critique. Banksy’s technique — precise multi-layer Mylar stencils applied quickly with spray paint in public spaces — requires designs that read clearly at distance, translate effectively in two to three colors, and reproduce exactly across different surfaces and scales. The characteristic Banksy aesthetic (hard-edged silhouettes, sharp color contrast, unexpected subject combinations) reflects both the technical constraints of spray-stencil work and deliberate aesthetic choices that make his images immediately recognizable. The street art tradition he exemplifies has influenced graphic design, advertising, and gallery art far beyond its urban origins.
Stencil Art Workshops in Anchorage
Anchorage stencil art workshops run 2–3 hours, covering both stencil cutting and application on paper, fabric, or canvas. Alaska wildlife silhouettes (ravens, bears, moose, salmon) cut from Mylar and applied in spray paint or brush-applied acrylic are popular workshop design choices that produce pieces with immediate Alaska character. T-shirt and tote bag stenciling sessions using freezer paper appear as group event formats.
Workshop prices run $35–$70, with Mylar, cutting tools, paint, and a substrate included. A home stencil starter kit (a roll of 4-mil Mylar, a craft knife set, a self-healing mat, and stencil brushes) costs $30–$50. Anchorage craft workshop participants can show and sell their finished work at year-round events including the Anchorage Market & Festival, the Anchorage Native Arts & Culture Festival, and the Alaska State Fair. Our free things to do in Anchorage guide covers the public art spaces and craft markets where Anchorage stencil artists exhibit and sell their work. Our Anchorage hiking guide covers the landscapes and wildlife — the bold silhouettes of ravens, the angular mountain horizons — that translate most powerfully into stenciling’s graphic, high-contrast aesthetic.
Photo by Vitaly Kushnir on Pexels.


No comments yet.