Pysanky Egg Decorating Classes and Workshops in Anchorage: A Complete Guide
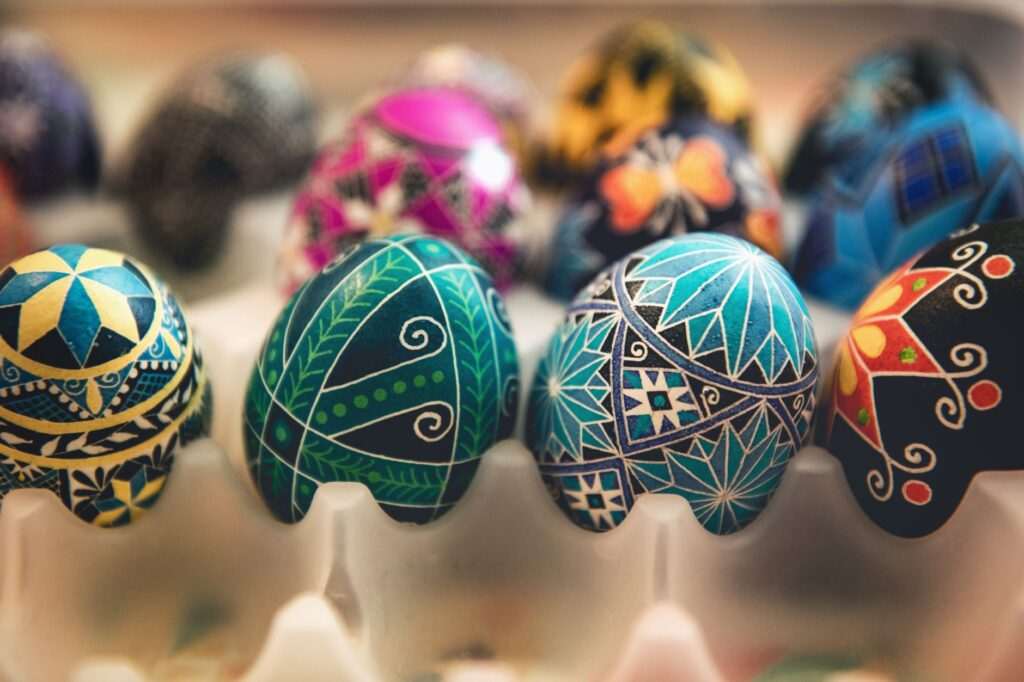
Pysanky — the traditional Ukrainian art of wax-resist egg decorating — is one of the most technically refined folk art traditions in the world, and one of the most surprising to encounter in a craft workshop setting. The finished objects are small (a single egg), deeply symbolic (each motif carries encoded meaning from pre-Christian and Christian Ukrainian tradition), and produced through a painstaking wax-and-dye process that reveals its final appearance only when the wax is melted away at the very end. The process runs entirely backward from expectation: you apply wax to protect colors you want to keep, dye the egg, apply more wax to protect the new color, dye again in a darker shade, and continue through multiple dye baths until the design is complete — only then does the wax come off to reveal what’s been building under it. Anchorage’s Ukrainian diaspora community and broader folk art interest have brought pysanky into the craft workshop landscape here, and the tradition has found new practitioners across cultural backgrounds who are drawn to its combination of meditative process and visually stunning results. This guide covers the kistka tool, beeswax resist, dye sequence, traditional motifs, finishing, and preservation in 2026.
The Kistka Tool and Beeswax
The kistka (plural: kistky) is the fundamental pysanky tool — a small metal funnel mounted on a wooden or metal handle. The funnel holds a small amount of beeswax; the handle is held near a candle flame to melt the wax in the funnel; and the molten wax flows through the fine tip of the funnel as the kistka is drawn across the egg surface. The drawn wax line cools almost immediately on the egg shell, creating a thin, precise resist line that protects the egg color at that point from subsequent dye baths.
Kistky come in several tip sizes — fine (for thin decorative lines and small text), medium (for standard design work), and heavy (for broad wax fills and background coverage). Most beginners start with a medium kistka and develop fine-tip technique as precision improves.
The beeswax used in pysanky is specially formulated for the purpose — it contains lampblack (carbon black pigment) which makes the wax visible against the egg shell and helps the carver see drawn lines clearly. Plain beeswax works but is harder to see during application. The wax must be kept fluid enough to flow from the kistka tip without clogging, which means maintaining the right temperature balance between the candle flame, the metal funnel’s heat retention, and the ambient temperature of the working environment.
The Dye Bath Sequence
The pysanky process begins with a raw or hard-boiled egg (traditional practice uses raw eggs; contemporary workshops often use hard-boiled or blown eggs for safety and longevity) and progresses through a sequence of dye baths from lightest to darkest color:
- Begin with the lightest color (typically yellow or white): Before any dye, draw in wax all design elements that should remain the raw egg color (white or cream). Dip the egg in the first dye bath (yellow).
- After the first dye bath: Draw wax over all areas that should remain yellow. Dip in the next dye bath (orange or light green, for example).
- Continue through progressively darker colors: Each wax application protects the current color; each dye bath adds the next. Common sequences: white → yellow → orange → red → black; white → yellow → green → blue → black; white → pink → red → burgundy.
- The final dye bath is always the darkest color in the design — black, navy, deep red, or forest green — which fills all unprotected areas. At this stage, the egg looks completely covered in wax and dark dye, with the design hidden entirely underneath.
Dye baths use aniline dyes specifically formulated for pysanky work. These dyes produce saturated, clear color on egg shell that’s different from fabric dyes; egg shells are porous in a way that produces particular color quality. Jacquard and Ukrainian-specific pysanky dye sets are the standard. Vinegar is added to the dye bath to increase dye uptake on the calcium carbonate shell.
Traditional Ukrainian Motifs and Symbols
Pysanky imagery isn’t merely decorative — each traditional motif carries encoded meaning from centuries of Ukrainian folk tradition, much of it pre-Christian in origin, later syncretized with Orthodox Christian symbolism:
- Soniashnik (sunflower/sun motif): The sun is among the most ancient and universal pysanky symbols, representing life, warmth, and the agricultural cycle. Geometric sun rays radiating from a central point appear across regional pysanky traditions in many variations.
- Bezkonechnyk (endless ribbon/meander): A continuous looping line with no beginning or end, symbolizing eternity, life continuity, and the interconnectedness of all things. The meander is one of the most ancient geometric symbols in human art, appearing in pysanky as a dividing element between design zones.
- Khrysty (crosses): Cross motifs in pysanky predate Christianity in Ukrainian folk tradition, where they represented the four cardinal directions and the sun. Post-Christianization, crosses took on additional spiritual meaning. Pysanky crosses range from simple equal-armed forms to elaborate multi-element compositions.
- Fish: An early Christian symbol that appears frequently in Easter pysanky — the traditional gift-giving occasion for finished eggs. Fish represent faith and the Christian community.
- Deer, horses, and birds: Animal motifs symbolize strength (deer, horses), speed, fertility, and the connection between the earthly and spiritual realms. Roosters symbolize the coming of a new day; deer represent prosperity.
- Wheat and plants: Agricultural motifs — sheaves of wheat, rye branches, oak leaves — appear in regional pysanky traditions tied to harvest and abundance.
- Geometric divisions: Most pysanky compositions divide the egg into sections (thirds, quarters, eighths) before applying motifs within each section — the geometric structure of the design is established with dividing lines before decorative motifs are added.
Removing the Wax
After the final dye bath, the egg is completely covered in wax-protected and dye-covered areas — the finished design is hidden. Wax removal is the dramatic final step that reveals the completed pysanka:
Hold the egg near (but not in) a candle flame, rotating slowly. The wax melts section by section; wipe each melted section with a soft cloth or tissue. The wax comes off quickly, and with each wipe, the color underneath is revealed. Working systematically around the egg from one end to the other, the design emerges in full color within a few minutes of careful flame-and-wipe work. The moment of wax removal — when the design is finally visible — is the most satisfying revelation in any craft practice, comparable to developing a photograph in a darkroom.
Care with the flame is essential: holding the egg too close produces scorching or soot on the shell; tilting toward the flame rather than rotating evenly produces uneven melting. A short candle or a tea light positions the egg at the right working distance more easily than a tall taper.
Preserving and Displaying Finished Eggs
Pysanky made on raw eggs require additional preservation steps:
After wax removal, the raw egg contents can be blown out by drilling small holes at the top and bottom with a pin and blowing through one hole until the contents drain from the other. The hollowed shell is rinsed, dried, and the holes can be filled with wax or left open. Alternatively, raw-egg pysanky can be left intact — raw eggs eventually dry out over years as the contents evaporate through the porous shell, which preserves the egg naturally without blowing. Hard-boiled or blown eggs skip these concerns.
A coat of varnish (Krylon spray clear coat, or a purpose-made egg varnish) applied after wax removal protects the shell and dye from humidity and handling and gives the surface a pleasing sheen. Display on small wooden stands, in shallow bowls, or in egg display cases that hold the eggs in suspended position without contact with the decorated surface.
Pysanky Workshops in Anchorage
Anchorage pysanky workshops typically run 3–4 hours, producing one to two finished eggs per participant. The seasonal connection to Easter (the traditional gift-giving occasion for pysanky) makes spring the most popular workshop season, though pysanky instruction runs year-round for practitioners interested in the craft beyond the Easter context. Alaska-specific design adaptations — aurora motifs, raven imagery, spruce branch elements — have begun appearing in Anchorage workshop curricula alongside traditional Ukrainian designs.
Workshop prices run $45–$85, with kistky, beeswax, dye sets, and eggs provided. A home pysanky starter kit (a kistka set, traditional dye colors, and beeswax) costs $30–$55 and enables many sessions of practice. Anchorage craft workshop participants can show and sell their finished work at year-round events including the Anchorage Market & Festival, the Anchorage Native Arts & Culture Festival, and the Alaska State Fair. Our free things to do in Anchorage guide covers the cultural community events and craft markets where Anchorage’s folk art traditions, including pysanky, are exhibited and celebrated. Our Anchorage hiking guide covers the natural environments — boreal forests, wildflower meadows, aurora skies — whose visual vocabulary Anchorage pysanky artists draw on for Alaska-adapted designs.
Photo by Tim Mossholder on Pexels.


No comments yet.