Papier Mache in Anchorage: Paste, Armature, and Sculpture Workshops (2026)
Papier mache — the technique of building sculptural forms from paper strips or pulp bonded with paste — is one of the most forgiving and accessible sculptural media available. Its ingredients are minimal (paper, paste, and a base form to build on), its tools are ordinary household items (scissors, bowls, brushes), and the finished surface — once dried, sanded, sealed, and painted — achieves a rigidity and surface quality that’s genuinely surprising given the humble starting materials. Papier mache has a history spanning multiple continents and cultures: the technique appears in ancient China (paper pulp used for lacquered helmet construction), in 18th-century France (where the literal translation “chewed paper” names the technique), and in folk art traditions across Mexico and Latin America (where papier mache masks, piñatas, and Day of the Dead figures maintain living craft traditions of great sophistication). Contemporary papier mache ranges from children’s piñata projects to gallery-quality sculptural pieces that rival traditional ceramics in ambition. In Anchorage, papier mache workshops serve both beginner audiences wanting accessible sculpture and more experienced crafters interested in the medium’s potential for complex, painted, finished objects. This guide covers paste recipes, paper types, armature and balloon bases, sanding and sealing, finishing, and project ideas for 2026.
Paste Recipes
The paste bonds paper layers together and determines the strength and surface quality of the finished piece:
Flour-Water Paste
The most traditional papier mache paste — cook 1 part flour with 5 parts water over medium heat, stirring constantly until the mixture thickens to a smooth, slightly translucent consistency (similar to a thin pudding). Allow to cool before use. Flour paste produces a very strong bond, dries hard, and is completely non-toxic. The limitation is that it can grow mold if the piece takes very long to dry or is stored in humid conditions — adding a small amount of salt to the paste inhibits mold growth. Flour paste is the standard for workshop settings and for practitioners who prefer natural, food-safe materials.
PVA Glue Paste
White craft glue (PVA — polyvinyl acetate) diluted with water (2 parts glue to 1 part water) produces a paste with excellent adhesion, faster drying than flour paste, and no mold risk. PVA paste produces a slightly more flexible cured result than flour paste and is more water-resistant. It’s the preferred paste for projects that need durability, quick drying times, or humid-environment use. Slightly more expensive than flour paste per project but consistently reliable. Many papier mache practitioners use PVA for later layers (for strength and adhesion) after establishing the initial form with flour paste for economy.
Wallpaper Paste
Commercial cellulose wallpaper paste (mixed to a thinner consistency than for wallpaper use) produces very smooth, clean papier mache with minimal texture variation between layers. It’s non-toxic, dries clear, and holds paper layers firmly. Popular among experienced papier mache artists who want maximum surface smoothness in the dried piece.
Newspaper vs. Tissue Paper
Different paper types produce different layer characteristics:
Newspaper is the standard papier mache material — widely available, free, tears cleanly in one direction (along the grain), and produces strong layers when wet with paste. Tearing rather than cutting newspaper produces softer, overlapping edges that blend more smoothly than cut edges. Newspaper’s ink can bleed through light-colored final paint layers; a gesso or white paint base coat after drying prevents bleed-through. Alternating newspaper from different sections (using different colored newsprint for alternate layers) makes it easy to see whether full coverage has been achieved — you can tell the layers apart visually.
Tissue paper and paper towel produce smoother surface layers and are used as final finishing coats over newspaper base layers. A final layer of white tissue paper torn into small pieces produces a smooth, uniform surface that takes paint without the gray-ink undertone of newspaper. Brown kraft paper (lunch bags, craft paper) produces very strong layers for structural components but doesn’t conform to tight curves as readily as newspaper.
Armature and Balloon Bases
Most papier mache projects build over a base form that establishes the overall shape:
- Balloons: Inflated balloons provide smooth, round, or oval base forms for bowls, masks, and round animal bodies. Paper is layered over the balloon; once dry, the balloon is popped and removed through an opening left in the paper shell. The interior is hollow and lightweight. Balloon papier mache is the most common approach for simple bowls and round vessel shapes.
- Wire armature: A bent wire skeleton (wire coat hangers, aluminum armature wire, or chicken wire for larger forms) defines the pose and proportions of a figure before paper layers are applied. Wire armatures allow upright standing figures, extended limbs, and complex poses that a solid mass form can’t support. The wire is covered with paper strips built up to the desired volume, then finished with smooth surface layers. Wire armature papier mache is the standard technique for animal figures, human figures, and any form that needs to be self-supporting in an upright position.
- Crumpled paper and tape: For rough forms that need more mass than a wire skeleton but don’t require a specific base shape, crumpled newspaper bound with masking tape creates a lightweight, free-form base. Particularly useful for organic, asymmetric forms where a balloon or rigid base would be too constraining.
- Recycled containers: Plastic bottles, cardboard tubes, boxes, and other recycled containers provide ready-made structural bases. A plastic bottle papier mached over produces a strong, rigid vessel; a cardboard tube base papier mached and carved produces cylindrical sculptural forms. Using recycled bases accelerates the structural phase and keeps materials costs minimal.
Building Layers
Layer number and application technique determine the finished piece’s strength and surface quality. Tear paper strips approximately 1–2 inches wide and 4–6 inches long; dip each strip in paste (or brush paste onto the form and lay dry strips over it), smooth down, and overlap each strip with the next by at least half its width. Complete full coverage in one direction before adding the next layer in a perpendicular direction — alternating directions between layers produces stronger bonding than parallel layers. Allow each two to three layers to dry completely before adding more; adding wet layers over wet layers slows drying and can produce a weak, soft interior in the finished piece. Most projects require 5–8 layers for adequate strength; structural projects (masks, large figures) benefit from 10 or more layers in high-stress areas.
Sanding and Sealing
After the final layer has dried completely (typically 24–48 hours in a warm space), the surface is sanded smooth:
Sand with 150–220 grit sandpaper to knock down obvious surface bumps and paper edges. A coat of white gesso (acrylic gesso from an art supply store) fills small surface irregularities, provides a uniform base for paint, and seals newspaper ink from bleeding. Two coats of gesso, lightly sanded between coats, produce the cleanest painting surface. Papier mache pieces painted without sealing show the gray of newspaper through light colors; sealing eliminates this problem.
Painting and Varnishing
Acrylic paint is the standard for papier mache finishing — it adheres well to the sealed surface, dries quickly, and provides the full color range for any painting approach from folk art to fine illustration. Thin coats applied in sequence produce better coverage and color depth than a single thick application. After painting, a coat of matte or gloss varnish (spray or brush-on) seals and protects the paint surface. Varnishing also makes the piece more water-resistant — papier mache is vulnerable to moisture without sealing, as the paper layers can re-soften if the piece gets wet.
Creative Projects
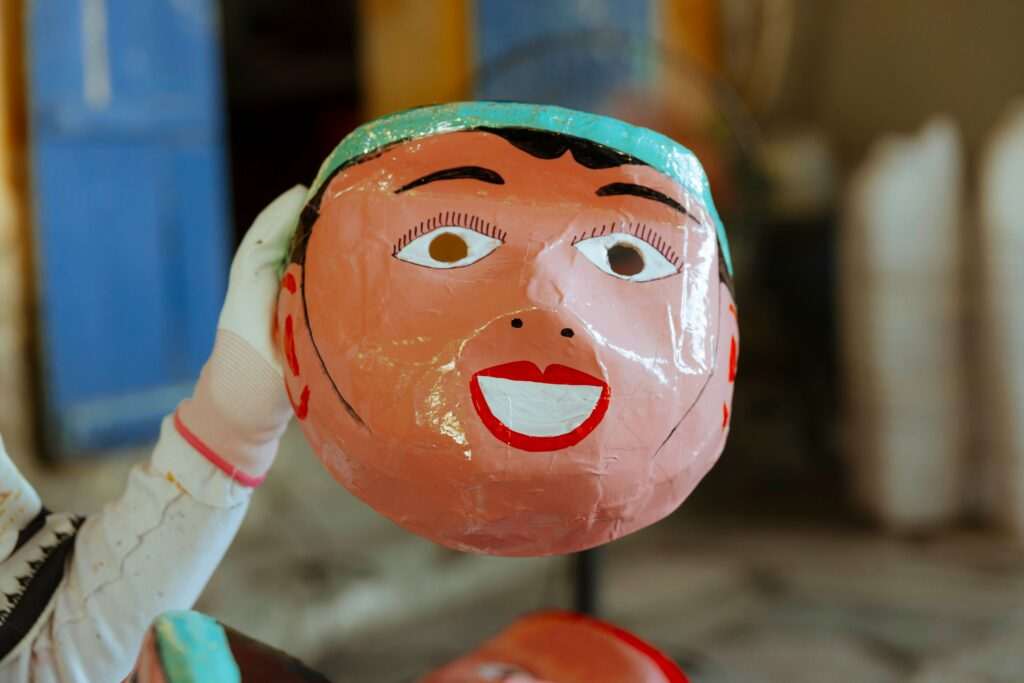
- Masks: Built over a face mold or a balloon half, papier mache masks are among the most traditional and dramatically effective projects. Alaska-inspired mask designs drawing on Northwest Coast Indigenous traditions appear in Anchorage papier mache workshop curricula.
- Decorative bowls: Balloon-base bowls in various sizes produce functional and decorative objects quickly. Alaska landscape painting on bowl exteriors — aurora backgrounds, wildflower bands — produces distinctive, regionally meaningful finished pieces.
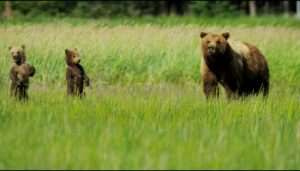
- Animal sculptures: Wire-armature figures of Alaska wildlife — bears, ravens, salmon, moose — develop the full range of papier mache skills in projects with genuine regional character. A well-finished painted bear figure in papier mache achieves a quality that’s genuinely impressive as a decorative object.
Papier Mache Workshops in Anchorage
Anchorage papier mache workshops typically run 3–4 hours for simple bowl and mask projects, with multi-session formats for wire-armature figure projects. The low material cost and non-toxic nature of most paste recipes make papier mache one of the most family-accessible craft workshop formats available in Anchorage.
Workshop prices run $30–$65, with all materials provided. A home papier mache starter kit (flour or PVA paste, newspaper supply, gesso, and acrylic paints) costs $15–$30. Anchorage craft workshop participants can show and sell their finished work at year-round events including the Anchorage Market & Festival, the Anchorage Native Arts & Culture Festival, and the Alaska State Fair. Our free things to do in Anchorage guide covers the community art events and family craft programs where papier mache instruction appears across Anchorage. Our Anchorage hiking guide covers the wildlife and landscape environments whose imagery — bears, ravens, Alaska wildflowers, mountain horizons — inspires the most compelling Alaska-specific papier mache projects.

No comments yet.