Needle Felting Classes and Workshops in Anchorage: Sculptures, Pins, and Fiber Art
Needle felting is a dry felting technique that uses a barbed needle — a slender metal spike with backward-facing notches along its shaft — to tangle and compact wool fibers into a cohesive, sculptural mass without water or soap. Unlike wet felting, which requires heat, agitation, and the controlled application of water and soap across a large surface, needle felting works on any scale: a single needle pushed repeatedly into a small wool ball gradually compresses it into a dense, firm form that holds its shape when released. The technique’s precision — you can add a tiny amount of a specific color to a very specific area — makes it the preferred method for detailed sculptural work, portraiture in fiber, and the fine illustrative flat pieces that have made needle felting one of the most popular fiber arts of the past decade. In Anchorage, needle felting has built a strong following partly through its connection to Alaska’s fiber arts community and partly because Alaska’s wildlife imagery — bears, ravens, puffins, salmon, moose — translates into needle felted figures with extraordinary naturalism. This guide covers needles, work surfaces, wool selection, flat and 3D felting techniques, color blending, and beginner projects in 2026.
Barbed Needles: Types and Gauges
The needle is everything in needle felting — its gauge (thickness) and barb configuration determine the type of work it’s suited for:
- Gauge numbers: Needle gauge follows a counter-intuitive numbering system — higher numbers indicate thinner needles. A 36-gauge needle is thick and aggressive, removing a lot of material per stroke and leaving visible puncture marks. A 42-gauge needle is very fine, ideal for detail work and surface finishing. A 38-gauge needle is the most versatile all-purpose size, used for the majority of intermediate work between rough shaping and fine detail.
- Twisted/star needles: Standard felting needles have straight barbs. Twisted or star-configured needles have barbs arranged in a spiral along the shaft, producing faster felting with more even surface texture — popular for background work and flat pieces where even coverage matters.
- Reverse needles: A specialized needle with barbs facing the opposite direction — they pull fiber upward rather than pushing it down, creating a fuzzy, raised surface texture. Used for fur effects, textured backgrounds, and the fluffy appearance of animal coats.
- Needle progression for a typical 3D piece: Start with a 36-gauge to rough-shape the form quickly, progress to 38-gauge for firming and detailing, finish with 40–42-gauge for surface smoothing and fine detail work.
Work Surfaces
The work surface protects the needle and the work table from the repeated stabbing action of needle felting:
- Foam pad: A dense foam block (specifically sold as felting foam or upholstery foam at least 2 inches thick) provides a forgiving surface that allows the needle to penetrate through the work without hitting a hard surface. The needle passes through the wool and into the foam, then pulls back out — the foam’s resistance is part of what compacts the fiber. Thinner or less dense foam compresses under use and loses its effectiveness quickly. A good foam pad lasts many projects before needing replacement.
- Brush mat: A stiff-bristled mat (similar to a nail brush but much larger) allows the needle to pass between the bristles rather than into foam. Brush mats produce slightly faster felting because there’s less resistance as the needle exits the fiber, and they’re easier to clean than foam. Some practitioners find them produce a slightly different surface texture than foam. Popular for flat pictorial felting.
- Protective gloves: Needle felting needles are extremely sharp and easy to stab into a fingertip during fast or inattentive work. Kevlar finger guards or leather thimble pads on the non-dominant hand prevent the most common needle felting injury. The caution level required is higher than most other fiber arts.
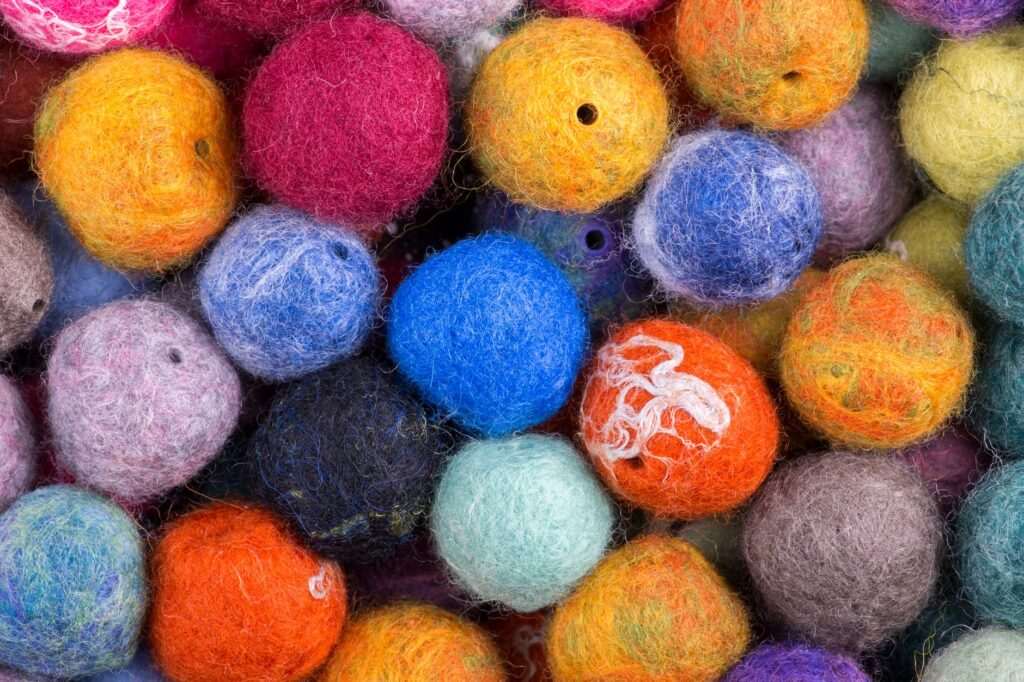
Wool Roving Fiber Selection
Wool is the standard needle felting fiber — the same barbed-scale property that enables wet felting enables needle felting, though here it’s the physical action of the barbs tangling the scales rather than water and agitation. Fiber selection affects how quickly the work felts and the surface quality of the finished piece:
- Core wool / wool batting: Coarser, less processed wool used as the structural interior of 3D figures. Core wool felts quickly and cheaply, providing the bulk and firmness of a sculpted form without the cost of using fine wool throughout. Most 3D figures are built on a core wool base covered with finer finishing wool.
- Corriedale roving: A medium-fine wool that felts reliably and is available in a broad range of hand-dyed colors. The standard fiber for most needle felting work — fine enough for good surface quality, but coarser than merino and therefore faster to felt in thick sections. Excellent for flat pictorial felting and the surface layer of 3D figures.
- Merino roving: The finest standard wool, producing the smoothest surface texture and the most subtle color blending. Merino felts more slowly than Corriedale and at a higher cost, but the results in fine portrait and pictorial work are noticeably superior. Used primarily for detail work and high-quality flat pieces.
3D Sculpting
Three-dimensional needle felting begins with building a wool core:
Pull a quantity of core wool and begin rolling it into the approximate shape of the form you’re building (a ball for a head, an elongated oval for a body). Begin needling the surface — pushing the needle repeatedly into the wool from different angles — which compresses and firms the shape. Add more wool in areas that need more volume; needle it into the existing mass. The key insight in 3D needle felting is that the more you needle an area, the firmer and smaller it becomes — you’re compressing, not adding material. Build forms slightly oversized, then needle down to the final shape.
Once the core form is firm, surface color is added in thin layers of fine wool needled onto the core, blending where colors meet by needling across the boundary line. Wire armature inside the form (before the surface layer goes on) allows poseable joints in figures where bending is desired — a bird’s legs, a figure’s arms.
Flat Pictorial Felting
Flat needle felted pictures build up layers of colored wool directly on a wool felt or fabric background, creating images that resemble painted illustrations in their color range but have a distinctive fiber texture. The technique is used for landscape scenes, animal portraits, botanical illustrations, and decorative panels mounted in frames.
Alaska subjects — a fireweed meadow with mountains behind, a raven in profile, a sockeye salmon in clear water — translate with particular effectiveness into flat needle felted images, where the medium’s ability to blend colors seamlessly produces the atmospheric gradients of Alaska’s dramatic skies and waters.
Color Blending
Needle felting’s color blending is fundamentally additive: blend two colors by needling them together where they meet. The thoroughness of blending depends on how many needle strokes cross the boundary — light needling leaves the colors distinct with a visible edge; heavy needling across the boundary produces a seamless gradient. Practicing controlled gradients on flat scraps before attempting finished work develops the skill for naturalistic color transitions in animal fur, sky gradients, and flower petals.
Beginner Projects
Two project types develop needle felting fundamentals effectively for beginners:
Simple 3D figures: A small round bird (a puffin, a robin) introduces core building, surface coverage, and basic attachment of separate elements (beak, feet). Completeable in a 2–3 hour workshop session with core and Corriedale wool.
Flat landscape or animal pins: A small brooch-scale flat panel (2–3 inches) with a needle-felted mountain scene or animal silhouette teaches color placement, blending, and working with fine detail in a quick, satisfying format. Flat pins are among the most popular beginner needle felting projects in Anchorage workshops.
Needle Felting Workshops in Anchorage
Anchorage needle felting workshops run 2–4 hours depending on whether the project is flat (shorter) or 3D (longer). The Alaska Fiber Arts community and Anchorage Weavers and Spinners Guild connect needle felting practitioners and surface workshop offerings periodically. Alaska wildlife subjects — puffins, ravens, bears, salmon, moose — are the most popular project themes in Anchorage workshops, producing pieces with specific regional character.
Workshop prices run $40–$80, with needles, foam pad, and roving included. A starter needle felting kit (assorted needle gauges, a foam pad, Corriedale roving in several colors, and a finger guard) costs $25–$45 and provides many project sessions. Anchorage craft workshop participants can show and sell their finished work at year-round events including the Anchorage Market & Festival, the Anchorage Native Arts & Culture Festival, and the Alaska State Fair. Our free things to do in Anchorage guide covers the fiber arts events and craft markets where Anchorage needle felting artists sell their work. Our Anchorage hiking guide covers the wildlife environments — coastal bluffs, boreal forest, alpine tundra — where the animals and landscapes that inspire Anchorage needle felting subjects are most accessible.
Photo by Lisa from Pexels on Pexels.

No comments yet.